
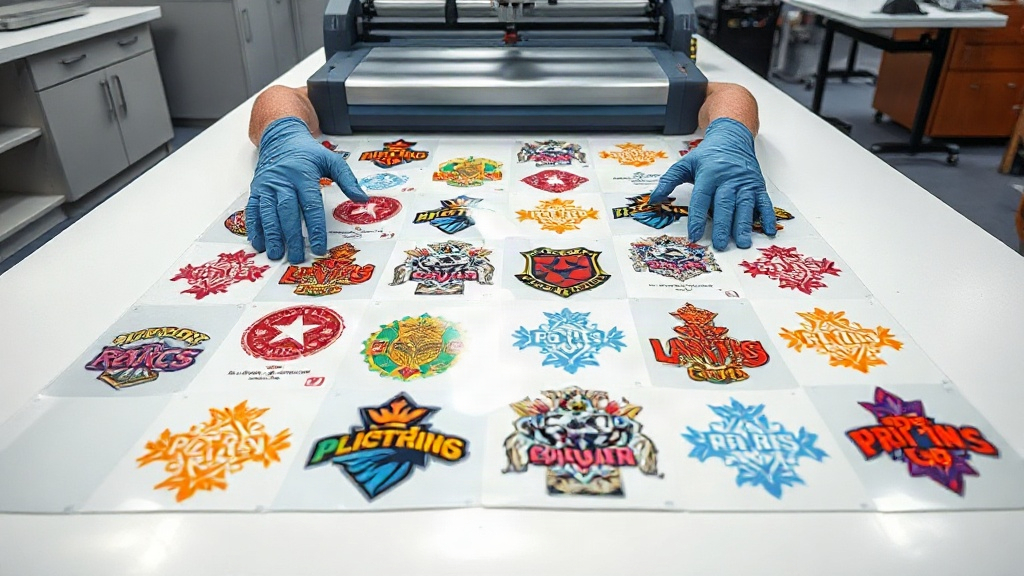
If you're in the custom apparel business, you've likely heard about DTF printing. But have you mastered the art of the DTF gangsheet? This powerful technique can transform your production line, slashing time and costs while delivering stunning, durable prints. In this guide, we'll dive deep into what gangsheets are, why they matter, and how to create them like a pro. Whether you're a seasoned printer or just starting out, you'll find actionable insights to elevate your game.
What Is a DTF Gangsheet?
A DTF gangsheet is essentially a large sheet of transfer film that contains multiple designs printed together in a single job. Instead of printing each design individually, you arrange them efficiently on one sheet, maximizing the use of the film and ink. This approach is akin to gang printing in traditional offset printing, where multiple jobs are combined to save time and resources.
In DTF printing, the process involves printing your designs onto a special film using DTF inks, then applying a powder adhesive, and finally curing the sheet. When you create a gangsheet, you're doing this for multiple designs at once. The result? A single sheet that can be cut apart and pressed onto various garments, one by one.
Why Use a DTF Gangsheet?
The benefits are numerous, and they compound as your business grows. Let's break down the key advantages.
Time Efficiency
Printing one design at a time is slow. Each job requires setup, printing, powdering, and curing. With a gangsheet, you consolidate these steps. Imagine printing 20 different designs in the time it used to take to print five. That's a game-changer for meeting tight deadlines and handling bulk orders.
Cost Savings
DTF film and ink aren't cheap. By nesting designs closely together, you minimize wasted space on the film. Less waste means lower material costs. Additionally, you use less powder because you're applying it to a single sheet rather than multiple small sheets. Over time, these savings add up significantly.
Consistency and Quality
When you print multiple designs in one go, they all go through the same curing process. This ensures consistent color vibrancy and durability across all transfers. No more worrying about one batch being slightly different from another.
How to Create a DTF Gangsheet
Creating a gangsheet isn't complicated, but it does require careful planning and the right tools. Here's a step-by-step guide.
Step 1: Gather Your Designs
Collect all the designs you need to print. They can be for different customers, sizes, or products. Ensure each design is prepared in a high-resolution format, preferably PNG with transparent backgrounds. Vector files work too, but you'll need to rasterize them for DTF printing.
Step 2: Choose the Right Film Size
DTF film comes in various widths, commonly 13 inches, 17 inches, and 24 inches. The width of your printer dictates what you can use. For a gangsheet, you want to fill the entire width and length of the film to maximize efficiency. Consider the dimensions of your designs and how they can be arranged.
Step 3: Use Gangsheet Builder Software
While you could manually arrange designs in a graphics program, dedicated gangsheet builder software makes the process much easier. These tools allow you to import multiple designs, automatically nest them, and even add cut lines. Some popular options include Gangsheet Builder by DTF Printer HQ, or you can use RIP software with gangsheet features.
Step 4: Arrange Designs Efficiently
Nesting is key. Rotate designs to fill gaps. Group similar sizes together. Leave a small gap (about 0.25 inches) between designs to allow for cutting. Also, consider the grain of the film if applicable. Most importantly, ensure no designs overlap.
Step 5: Print, Powder, and Cure
Once your gangsheet is laid out, send it to your DTF printer. After printing, apply the adhesive powder evenly. Shake off excess, then cure the sheet in an oven or with a heat press. Follow your ink and film manufacturer's recommendations for temperature and time.
Step 6: Cut and Press
After curing, your gangsheet is ready. Use a cutter (manual or automated) to separate the individual transfers. Then, press them onto garments using a heat press. Typical settings are 320°F for 10-15 seconds with medium pressure.
Best Practices for DTF Gangsheets
To get the most out of your gangsheets, keep these tips in mind.
- Plan ahead: Group designs by similar ink coverage and color profiles to avoid under- or over-curing.
- Mind the margins: Leave at least 0.25 inches between designs and around the edges for easy handling.
- Test your settings: Every printer, ink, and film combination behaves differently. Run a small test gangsheet to dial in your settings.
- Keep it clean: Dust and lint can ruin a gangsheet. Work in a clean environment and handle film with care.
- Store properly: If not using immediately, store cured gangsheets in a cool, dry place away from direct sunlight.
Common Mistakes to Avoid
Even experienced printers can slip up. Watch out for these pitfalls.
- Overcrowding: Cramming too many designs can lead to cutting errors and poor adhesion. Leave breathing room.
- Inconsistent powder application: Too much powder causes a rough feel; too little leads to poor wash durability. Aim for an even, thin layer.
- Improper curing: Under-cured transfers peel; over-cured ones crack. Invest in a good curing oven or heat press with accurate temperature control.
- Ignoring color profiles: DTF printers use CMYK plus white. Ensure your designs are in the correct color mode and that white ink is properly managed.
Advanced Tips for Pros
Ready to take your gangsheet game to the next level? Try these advanced strategies.
- Automate with scripts: If you frequently print similar gangsheets, create templates or scripts to automate the layout process.
- Use variable data: For jobs like team jerseys with individual names and numbers, gangsheets can incorporate variable data for personalization.
- Optimize for cutting: Add registration marks or cut lines in your gangsheet design to speed up cutting, especially if you use a plotter or cutter.
- Monitor ink usage: Keep track of ink consumption per gangsheet to better estimate costs and pricing.
Frequently Asked Questions
What is the maximum size for a DTF gangsheet?
The maximum size depends on your printer and film roll. Common film widths are 13", 17", and 24". Length can be continuous, but practical limits are around 10-20 feet due to handling and curing constraints.
Can I mix different designs with varying colors on one gangsheet?
Absolutely. That's the beauty of gangsheets. However, be mindful of designs with heavy white ink or dark backgrounds, as they may require different powder amounts. Group similar designs together when possible.
How do I ensure my gangsheet transfers wash well?
Proper curing and powder application are crucial. Use high-quality DTF powder, cure at the recommended temperature, and always do a wash test. Typically, a correctly made DTF transfer will withstand 50+ washes.
Do I need special software to create a gangsheet?
While you can use general graphic design software, dedicated gangsheet builders save time and reduce errors. They automate nesting, add cut lines, and optimize film usage. Many DTF printer manufacturers offer free or affordable software.
How much can I save by using gangsheets?
Savings vary, but many printers report 30-50% reduction in film and ink costs, plus significant time savings. The more efficient your nesting, the greater the savings.
Mastering the DTF gangsheet is a skill that pays off. By implementing the strategies in this guide, you'll streamline your workflow, reduce costs, and deliver outstanding results to your customers. Start experimenting with gangsheets today and watch your production efficiency soar.